#Thermomix · Asian · Belgian · Brazilian · Bread · Cake · Chicken · Chinese · Curry · Eggs · Family · Feel-Good · French · Friends · Hakka · Indian · Indonesian · Informative · Leisure · Main Course · Malaysian · Meat · Noodles · Nostalgia · Own Recipe · Pasta · Personal · Pie · Poultry · Reunion · Rice · Salad · Sarawakian · Savoury

Tom Yum Goong (Fragrant Prawn Broth): The way I like it with no sugar added and celebrating my 1st year anniversary with my TM5 #thermomix

1st November this year fell on a Tuesday. I could have made a bridge for a longer “weekend”, but could not due to my workload at work 😦

I was glad to break off work for that one day that week for a yearly family reunion, hosted by one of my SIL’s. While driving to my SIL’s, we stopped at a friend’s house. I received a text message from F that she was giving away some of her ‘harvests’ in her garden. 

Guess what? I hand-picked the chillies in her garden. They were so, very, very fresh! She wanted only the red ones, so I helped myself to the green chillies. I didn’t mind the ‘raw version’ at all, because I knew if I left the chillies wrapped in absorbent paper in the lower drawer of the fridge, the chillies would ripen. 

And I was right!

10 days later, some of the birds’ eye chillies had turned to a lovely bright orange-crimson colour. And I knew exactly where some of the chillies would end up into 😉

Thai Chef vs Me

There was one Wednesday that I took a day off and brought my 2 sons out for lunch (Note, both boys had half-day school / Univ on a Wednesday). We went to a Thai resto near our place. 

For starter, I ordered Tom Yum Goong (TYG) for us. It was a good TYG, but I missed that Oomph in their soup. It was a wee bit too lame. 

Saturday came, and TYG was in the pipeline for our lunch menu.

So here it was, my version vs the Thai Chef’s. 


And not only that, I made my TYG in my thermomix! 


To be honest, I could eat my TYG all day without anything else that day, because it had been a while since I last made the soup! I looked back at a post I wrote; it was in March this year when I had friends over. You can read it all … Here 🙂

Because I love bold-tasting soups, I thought of a way to totally infuse the aromatics in the soup first before proceeding further. Be warned! It’s a highly seasoned soup that hits the palate and warms the heart without burning, if you know what I meant 😉

(Note: This is my own recipe using my preferred method – tried and tested – after a few trials and errors).  

Please be aware that some measurements are not given as only you will know how much or how little you want to put in the dish. Remember, “Ut quod ali cibus est aliis fuat acre venenum” or what is food for one man may be bitter poison to others. 

Ingredients A

  • 2 cm piece galangal
  • 1 shallot
  • 1 lemongrass
  • 2 coriander roots

Ingredient B

  • 5 g cooking oil / coconut oil

Ingredient C

  • 1,500 g water

Ingredients D

  • Lemongrass, bruised and halved
  • Shallots, halved 
  • Galangal, sliced
  • Bird’s eye chillies, lightly bruised
  • Kaffir lime leaves, lightly bruised with the fingers

Ingredients E

  • Fish sauce, to taste
  • Homemade chilli paste, eyeball for colour, taste and flavour
  • Salt, to taste 

Ingredients F

  • Prawns, shelled 
  • Mushrooms, sliced 

Ingredient G

  • Lime juice, to taste
  • Cherry tomatoes, halved or whole

Ingredient H

  • Fresh coriander 

Steps –

  • Place A in the TM bowl. Grind 5 sec/ sp 10  * 2

  • Add B. Sauté for 3 mins/100C/ sp 2 
  • Place D in SB and add C. Cook for 15 mins/ 120C/ sp1


  • Remove the SB and tip the aromatics in a bowl. Set aside for garnish later.

  • Transfer F in the SB. Cook for 4 mins/120C/ sp 1 or until the prawns are cooked. 

  • Remove the SB and set aside the cooked prawns, mushrooms, etc
  • Add E. Cook further for 5 mins/ 120C/ sp 2


  • Add G. Stir for 1 min/ R/ spoon
  • Assemble a serving bowl with prawns, mushrooms, cherry tomatoes, some slices of galangal, bird’s eye chillies, lemongrass and kaffir lime leaves. Garnish with H.
  • Done!


Happy 1st Anniversary!

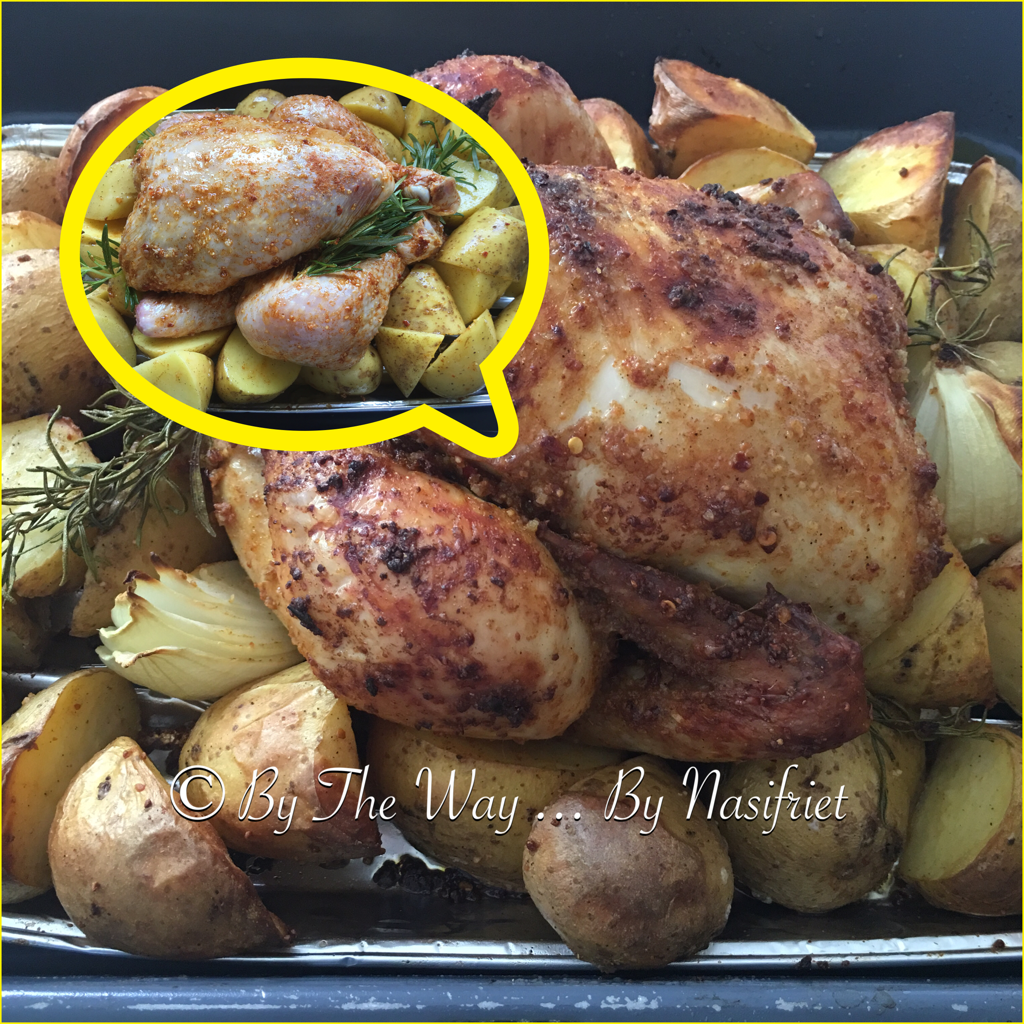
I made the TYG to go with my Nasi Ulam and baked spiced chicken. Our Saturday lunch was the bomb, by the way, with full-blown explosion of flavours. Yup, my kind of food 🙂


There’s no better way to celebrate my first year anniversary of owning the thermomix than sharing with you some of the dishes I have conjured the past 12 months using my most used kitchen gadget today!

And as they say, ‘A picture is worth a thousand words‘ …


IMPORTANT NOTICE : Please be aware that I’m neither a Consultant/ Advisor nor an employee of Thermomix.  I am NOT paid anything from any parties. I just happened to own a thermomix and love doing what I’m doing and will continue doing so. 

Happy Mid-Week ya’ll!

Cheers!

Chicken · Informative · Main Course · Own Recipe · Personal · Poultry · Savoury

Foolproof Homemade Oven-Baked Whole Chicken … Eureka!

The rotisserie whole chickens looked so tempting. Every Wednesday evening while driving home from work, I would drive past the mobile food truck on the N2 road from Brussels to Leuven.


I could smell the roasted chicken smoke whiffing past my nostrils through the vents of my car somewhere! It’s oh so tempting. 

I just had to stop. 

So one Wednesday evening, I stopped and walked towards the food truck.

There was only one guy manning the truck that evening. I pointed to the chicken I wanted and some baked potatoes. The guy then packed the roasted bird in a microwaveable paper bag, and a separate bag for the potatoes.

I was pretty certain my guys at home would be beaming with delight from what I had just bought.

BUT … Most unfortunately what you see is not what you get!  The chicken was juiceless and shrivelled when I carved the meat. No doubt it was cooked through, but the taste was rather bland. I suspected only salt, pepper and paprika powder were used to season the chicken. To add salt to injury, the potatoes were swimming in buckets of dripping! Urgh!

Hubby had his last words, “Don’t buy this chicken any more!

I Did It My Way …!

Okay, I did not buy the rotisserie whole chicken anymore from the food truck, but we have had some form of rotisserie whole chicken at home, done my way *big smile*

Oh by the way, I had been fiddling with the flavours of the chicken and I have found the right one, me thinks!

I oven-baked this whole chicken last Sunday and my family of 4 finished the entire bird and licked our platters clean!


This simple lunch was a keeper. It was hassle-free. While waiting for the chicken and potatoes to cook in the oven, I prepared a simple and quick salad. I had the most idle Sunday ever. Yay!


Eureka! 

Here’s how I did it. 

First of all, pre-heat the oven at 190 degrees Celsius.

Rinse and pat dry 1 whole chicken weighing at least 1.5kg. Set the chicken aside to room temperature for at least half an hour.

In a clean bowl, mix together your favourite dry herbs and spices, sea salt and freshly-milled black pepper. The choice is endless, so don’t be shy. Stir well to combine.

Meanwhile, stuff the cavity of the chicken with 4 cloves garlic, 1 lemon or lime (halved), 1 onion (quartered), a few slices of ginger and fresh rosemary. Tie the legs together and tuck the wings under the chicken. This is the trick to keep the chicken sappy AND tasty from inception to end. *wink*

Next, drizzle some olive oil over the chicken and transfer the homemade rub mixture all over the chicken. Then comes the most therapeutic part … massage the chicken thoroughly with the rub mixture making sure every nook and cranny of the bird is being swaddled completely.

Finally, transfer the chicken, breast-side up onto a baking tray, lined with (olive) oiled and seasoned potatoes and/ or root vegetables, onions, garlics and fresh rosemary.


Bake the chicken for 1 hour 30 minutes in the pre-heated oven at 190 deg C. Remove the chicken from the oven and let it rest for at least 15 minutes before carving. 


The chicken may look dry at the first instant, but trust me, the meat is cooked through perfectly and is as juicy and succulent as ever!


By the way, I have oven-baked whole chicken a few times already. I discovered that baking at the right temperature and timing  are paramount execution in getting the best equilibrium.  Believe you me, I have had a few charred experiences. It was only by several trials and errors that I can finally say, Eureka!


My Verdict?
 

Well, I will definitely not buy the rotisserie chicken from the food truck anymore, that’s for sure! 

What can I say, nothing beats homemade cooking any day, any time. Simple as that!

A word of caution though, this foolproof baking is in accordance to the type of oven I own. You may have a different oven than mine, hence, the temperature and timing may or may not differ. And I did mention that it was by several trials and errors that I finally got the bird cooked right, my way *wink*

Have a great week ahead!

Cheers!

#Thermomix · Cooking with Herbs · Informative · Kuching · Main Course · Own Recipe · Poultry · Sarawakian · Savoury · Thermomix · TM5 · TM5 Thermomix

Ka Chang Ma (Braised Motherwort Chicken dish) #thermomix

There is a saying, “You can take a Sarawakian out of Sarawak, but you can’t take Sarawak out of a Sarawakian“. It’s a quaint way of saying that you are bound to remember your roots wherever you are 🙂

This is so true in my case, where food is concerned, of course. I’m sure many people fall in the same boat as I do *wink*  

Moving to Belgium some two decades ago, revisiting and reminiscing childhood memories in any shapes and forms become a norm. The dish that I often re-visit time and time again is none other than the murky-looking green dish called Ka Chang Ma (KCM) where chicken meat is the main protein ingredient in the recipe. This dish is undisputably renowed (only) in Sarawak, especially in Kuching. It’s not everyone’s favourite dish, to be honest, because the dish has been stigmatised as a food for women in confinement. This conservative rationale no longer holds true today. KCM is cooked all year round.

Thermomix Cooking Defined

3 years ago, I posted a rather comprehensive write-up of this unique dish, with a story to tell. You can read it all here: Ka Chang Ma (The Mother of all Dishes)

While it was prepared the conventional way (with Mum’s recipe et al) then, I converted the recipe in the Thermomix jargon. Now, I have both methods on my blog which I can refer to anytime  🙂


KCM cooked the Conventional way (day light)
 
KCM cooked in TM5 (night light)
  

Cooking in either way had no influence on the taste (the end result), however, the cooking processes were obviously different. 

In a nutshell (metaphorically speaking): You want to go to Restaurant X. You have a choice of either taking the car which takes 5 mins OR on foot, which takes 15 mins. By either taking the car or going on foot, you will reach the same ultimate destination. The differences are the mode of transportation and the duration it takes from origin to destination. In this example the car was the Thermomix  way of cooking, whilst going on foot was the conventional  or traditional way of cooking. Got it?

Or simply, the Thermomix is just another collection of kitchen gadget in addition to a Slow Cooker, a Multi Cooker, a Pressure Cooker, etc that you might already have, only that it replaces at least 10 kitchen appliances: blender, grater, chopper, steamer, (slow)cooker, rice cooker, mixer, soup maker, dough kneading machine to name but a few.

Any conventional recipe can be converted to the TM method. There’s no secret. There’s no trick.  All you need to do is to decipher the logic.


How I cooked the KCM in my TM5

Ingredient A –

  • 10 g loose leaf KCM (Motherwort) dried herb 

Ingredients B –

  • 20 g sesame oil
  • 695 g chicken drumsticks 

Ingredients C –

  • 10 g ground KCM dried herb
  • 10 g ground ginger
  • 50 g whiskey 
  • 200 g water

Ingredients D –

  • 20 g whiskey 
  • 300 g water
  • 1/2 cube vegetable stock
  • 1 tsp ground ginger 
  • 5 g sesame oil

   
 How to prepare?

  1. Toast the loose leaf KCM in the TM bowl for 10 mins/ V/ sp1
  2. Grind the toasted herb when the temperature drops below 60 deg C. Mill for 1 min/ sp6 -> 10
  3. Tip ground KCM in a clean bowl. Set aside.
  4. Add B in TM bowl. Cook for 5 mins/ V/ R/ spoon.
  5. Add C and cook further for 22 mins/ V/ R/ spoon
  6. Adjust seasoning by adding D. Cook for a further 5 mins/ V/ R/ spoon
  7. Done!


Verdict : KCM is undeniably one of my favourite comfort foods. With its myriad of nutritional benefits, I could have this dish anytime I want, but like many things, there is always a limit. Moderation is key.  By the way, I have cooked several different dishes with or without using the Thermomix. There are some dishes that worked better the conventional way. For KCM, if given the choice, I would cook the dish in my TM5. Why? Because the cooking is 100% done in the Thermomix, from dry-roasting the herbs to grinding the herbs to braising the chicken. Et voilà, dinner’s served! Simply effortless.

The KCM Chicken dish (or braised Motherwort Chicken dish) is a local dish of Sarawak. For this I’m linking this post to April Tea Time Treats: Local & Regional Recipes hosted by Lavender and Lovage and The Hedgecombers

  
Ka Chang Ma is Motherwort, an herbaceous plant of the mint family. This recipe uses only the dried herb. I’m linking this post to Lavender and Lovage’s Cooking with Herbs for Easter and Spring


Have a great week!

Cheers!

BBQ · Chinese · CookBlogShare · Cooking with Herbs · Little Thumbs Up! · Poultry · Tea Time Treats

Tea-Smoked Chicken Thighs

I must confess that I was a hopeless, pathetic cook when I moved to Belgium permanently in 1995. I was a nervous wreck in the kitchen not knowing how to start…. until I watched Can’t Cook, Won’t Cook which was aired on BBC1 on weekday mornings. To be honest, I could relate myself to one of the categories of “useless” cooks, “Can’t Cook!” *blush*

One of my utterly useless kitchen disasters was baking a swiss roll cake for the first time that turned out leather-hard and completely un-rollable. It was meant to be a surprise for hubby’s birthday, but alas, hubby didn’t get to see a rolled cake because it went in the dustbin! And then I wanted to slow cook a pigeon which I got from my late MIL. The pigeon was freshly hunted when I first got it, but I froze the bird when I got home. Well, that’s OK because I was not in a hurry to make a meal out of the bird then. When I finally wanted a bird meal, I took the pigeon out from the freezer and dumped it in the slow cooker and filled the cooker with water that literally drowned the bird! No matter how long I cooked the bird, it remained hard rock frozen! So in went the bird in the bin!

There was no such thing as internet then. Or maybe there was, but I did not own a PC, and smartphones were unheard of then. Luckily, there were several “ancient” ways to refer to recipes, id est, recipe books, magazines, my prized helpline – Mummy dearest – and of course the multitude of cookery channels on the telly!

Being a newbie in a non-English speaking country, BBC was a big relief for me, because (1) BBC1 had loads of back-to-back cookery programs and (2) the programs were in English!! Yay!!

Ready, Steady, Cook!

Strange, but true, I first saw James Martin, one of the Chefs on Ready Steady Cook, prepared this ancient Chinese technique of smoking chicken in a wok in 20 minutes! He used only 3 ingredients – uncooked rice, sugar and tea – as the smoking mix.

>>> Fast forward 

Thanks to RSC, I have done several tea-smokings in my kitchen, in the meantime, and have experimented with different spices, herbs and proteins : tea-smoked salmon, duck, chicken and turkey.   

Here’s one I made recently, tea-smoked chicken thighs with Asian ingredients.

  You need –

  • 1 kg chicken thighs/ cutlets, skinned
  • 3 Stalks Spring Onions
  • Root Ginger, sliced (skin on)
  • 1/2 cup Hua Diao Rice Wine
  • Mushroom Soy Sauce
  • Salt to taste
  • Sesame oil

Marinate the chicken overnight in a ziplock bag.  

For glazing – 

  • Water
  • Honey


The next day, boil 500 ml water in an electric kettle. Remove the marinated chicken on a plate. Add the marinade in a pan and pour in boiling water. Cook the gravy until simmering hot. Add the chicken pieces in the pan. Boil the broth with the chicken until bubbling hot. Season to taste. Total cooking time should be at least 30 minutes. Remove the chicken pieces and transfer them to a colander to release any excess liquid. 

Glaze the chicken pieces with the honey water. 

Next prepare the tea-smoked ingredients –

  • 1/2 cup uncooked fragrant rice 
  • 1/4 cup mixture of light brown and palm sugars (or the less expensive white sugar works well, too)
  • 6 sachets of Jasmine tea with petals (as a matter of fact, any type of loose tea leaves will do)
  • 1/2 Tbsp Sichuan peppercorns 
  • 1 Tbsp Coriander Seeds
  • 4 dried chillies
  • Rind of 1 lemon
  • Heavy-duty aluminium foil 


Toss and mix the ingredients on a heavy-duty aluminium foil.


Add rinds of one lemon and place the aluminium foil in a wok. A wire rack is suspended above the tea-smoked mix.  

Heat the wok on medium to high heat, covered, until a few wisps of smoke escape from the lid. Then transfer the honey-glazed chicken pieces on the wire rack.   

Keep smoking the chicken for 45 minutes to 1 hour  (Note: I have an induction stove-top, hence  the longer smoking time

Ta-da! 

 Serve the tea-smoked chicken with home-made pickled red onion and some salad leaves. Yums!


My 100% home-made summer platter of tea-smoked chicken with pasta, pickled red onion, chunky guacamole and salad leaves


Verdict: As this is an indoor cooking (with an outdoor mindset), always pre-cook and season your proteins before smoking (or steaming) them. I found  marinating the meat overnight makes the meat more flavourful. The tea-smoking method is not a cooking method but is simply a technique to infuse the proteins to another level of imbued fragrance of smokiness.  It is important not to pre-smoke too long as the final result will be shamefully bitter, literally speaking. 

The selections of spices and herbs are just endless. For instance, Duck goes well with star anise, lemon and orange zests and five-spiced powder.  Salmon goes well with dhill, mixed peppercorns and lemon rind, Lamb with rosemary and thyme, and etcetera.  The sky is the limit and of course, most importantly, think out of the box and get out of your comfort zone and enjoy! And by the way, I’m learning all the time 😉

With “TEA” as the oddball and key ingredient in this recipe, I’m hopping over to the blog-hop event at Little Thumbs Up (July 2015 theme: TEA) organised by Zoe of Bake for Happy Kids and Doreen of my little favourite DIY, and hosted by Cheryl of Baking Taitai


I’m also sharing this post over at Cooking with Herbs for July: BBQ, hosted by Karen of Lavender & Lovage

With Summer in mind, this indoor smoking technique with an outdoor mindset, is perfect for the July Tea Time Treats with the theme “BBQ Fodder“, hosted by Janie of The Hedgecombers

    
It is with deep regret to have learnt that this is the last time Lucy at Supergolden Bakes will be hosting one of the coolest and most flexible blog-hop challenges. I wish her all the best and success in her new job. Congratulations, Lucy. I have enjoyed reading her blog and have drooled over her most amazing bakes! Without much ado, I’m linking this post at  #CookBlogShare 


    Chinese · Chinese New Year · Friends · Japanese · Little Thumbs Up! · Poultry · Savoury · Soup · Spicy

    The Potstickers that won’t Stick but Run (Failed in sight but Passed in taste)

    Two months ago, we had a small CNY pot-luck reunion with some closed friends.  The pot-luck was decided at the eleventh hour as we had planned to dine at a restaurant, hoping for a larger turnout. Since most of the invited friends had scheduled prior appointments with their families and friends for separate reunions, the planned quorum dwindled further. 


    Then one of the girls suggested meeting up for a simple pot-luck reunion at her house. The rest of us were thrilled because the lady-of-the-house is a fantastic cook and I kid you not! Not only that, she is a Jane of all trades and ‘master’ of all, which completely defies the figure of speech, “Jack of all trades, master of none.” 


    As you  can see from the photo collage, we were well fed with simple, purely homemade yet fantastically delicious dishes!  The lady-of-the-house made the absolutely delicious Yee Sang (Prosperity Toss) and tasty Pan Mee (with noodles she made from scratch!).  She also baked a flawless pandan chiffon cake, almond/ cashew cookies, chocolate mousse and kueh sepit (not in photo).  I brought my signature dish, Ngo Hiang.  My friends, X, brought a meringue cake and C brought a bowl of minced mix ingredients and a packet of frozen gyoza wrappers or gyoza skins.


    It was the last item that ‘pushed’ me to write this post. Thanks, C for “reminding” me 😉


    By the way, it was a good thing that C did not bring pre-wrapped gyoza‘s.  That way, we all had the opportunity to learn first hand crimping of the gyoza’s from … who else? The lady-of-the-house herself!


    Not the First and Definitely not the Last


    This was not the first time I have cooked a dish that turned out into something else quite differently but completely edible, like so …


    Making yaki gyoza or guo tie or wo tieh or potstickers has been at the back of my mind for a long, long time. The origin of this dish is Chinese. In China, they are called jiaozi.  The Japanese word gyōza indicates that the word is of non-Japanese origin and was derived from the Shandong Chinese dialect giaozi. There’s 2-in-1-method of cooking gyoza. First they are shallow fried with a small amount of sesame oil in a hot pan or wok until  brown crusts appear on the flat base, and then a small amount of water (or cornstarch mixture) is poured over the dumplings, with the pan or wok covered. The liquid helps to steam the dumplings, creating a texture contrast of the thin crispy bottom and soft and juicy upper part, typical of Chinese cuisine.


    Why I chose to use the word gyoza is because the ingredients I used as filling were more Japanese than Chinese.  I’m also referring to them as  potstickers, because it’s an English word and a lot easier to pronounce.  Anyway, “pot stick” is the literal translation from the Chinese word guōtiē.


    Grievous Mistake 


    I have made a calamitous error when purchasing the gyoza skins or wrappers. I knew the wrappers should be round and not square.  The square ones are used for making Wonton. Without reading the label, I placed the round dumpling wrappers in my shopping basket.  I was a happy bunny that day. 


    Finally


    I’m gonna make potstickers!! Yay!  


    My sons were looking forward to the tasty finger food.  They were thrilled and couldn’t wait for the end result!


    BUT wait a sec … there’s a difference in the thickness of the wrappers! Gyoza skins are generally thicker than the delicate wonton skins, hence, making them more suitable for frying.  It was a shame I bought the thinner and delicate dumpling skins used for wrapping sio bee or siu mai (popularly served at dim sum restaurants).


    Hmmmm….. I had already marinated a bowl of minced filling for the gyoza.  There was no turning back.  The show must go on!


    Splashing Plan B !


    With the flopped original plan of making gyoza or potstickers, I told my clearly disappointed looking boys that there was not going to be any dry finger-food-type gyoza but a wet and soupy dumpling soup! If only you had seen their faces and heard their remarks …


    I told myself that if the Potstickers won’t stick then I had to transform the dish into something equally appetising, hence, Plan B was put into action 🙂


    Yup, a splashing runny dumpling soup!


    Ingredients –

    • 300g minced chicken
    • Napa cabbage, thinly shredded
    • 1/2 Leek, finely diced (or 2-3 spring onions)
    • 2 cloves garlic, minced
    • 3 cm Ginger, finely grated
    • 1/2 Carrot, grated
    • 5 cm Daikon, grated
    • 2 Tbsp sesame oil
    • 2 Tbsp sushi and sashimi soy sauce
    • 2 tsp Thai spicy fish powder ( in lieu of bonito powder)
    • 1 Tbsp Shaoxing wine ( in lieu of mirin)
    • 1 Tbsp corn flour
    • Freshly milled white pepper
    • Salt, to taste

    1 packet (250g) Round dumpling skins

    For the broth

    • 1 big carrot, washed and cut in very thin rounds
    • 2 stalks celery, washed and remove stringy outer layer
    • 2 stalks lemongrass, bruised
    • 3 cm ginger, bruised
    • 2 cloves garlic
    • 1 red chilli (optional)
    • Sesame oil
    • Shaoxing wine
    • Dried Coriander (I did not have fresh coriander that day)
    • 1/2 a chicken stock cube
    • Coarse Sea Salt to taste 
    • Freshly milled white pepper to taste 
    • 1.7L Water, boiled in electric kettle
    • Water, boiled for cooking the dumplings 

    Method

    1. Mix all the ingredients together and refrigerate for at least one hour 
    2. Remove the minced mix at least 15 to 30 mins before starting to wrap the dumplings
    3. In a soup pot, throw in the cut carrots, celery, 2 cloves garlic, ginger, lemongrass, coriander and chilli. Pour in the boiling water into the pot.  At this point, you can smell the fragrance and aroma of the herbs and vegetables whiffing past your nostrils
    4. Season the broth with sesame oil, Shaoxing wine, salt and white pepper
    5. Cook the broth further until boiled 
    6. In another pot, boil enough water to cook the dumplings per serving. Note: this water is NOT the broth for consumption, but just to cook through the dumplings separately.
    7. Ready to serve.  Place 8 to 10 pieces of dumplings in the hot water. The dumplings are cooked when they start floating to the surface. Scoop the dumplings, removing as much water as possible to a serving bowl. Then scoop the broth picking up some carrots, celery, chillies and coriander and transfer to the serving bowl.

    Et voila!


    Verdict: Without a word said, my boys slurped their bowls of  dumpling soup clean. I think that’s translated as “Thumbs UP” 🙂

    Be warned, though, of the spicy filling (spicy fish powder) and the extra chilli in the broth. The extra garlicky flavour differentiates the Gyoza soup with a twist from the milder wonton soup. I will definitely make these again 😉

    I’m linking this post to Little Thumbs Up April event “CHICKEN“, organised by Zoe of Bake for Happy Kids and Doreen of my little favourite DIY, and hosted by Diana from Domestic Goddess Wannabe 


    Have a great weekend!

    Cheers!