#Thermomix · Cooking with Herbs · Eat Your Greens · Malaysian · Own Recipe · Personal · Rice · Salad · Thermomix · TM5 · TM5 Thermomix

Nasi Ulam (Fresh & Fragrant Herbed Rice Salad) #thermomix

Phew! It’s a looonng process, but I’m so glad I DID it … finally, with some help from my thermie 🙂

Eating white rice can be rather boring, so to make the staple more enticing, a bit of picasso and van gogh will bring the little white beads to life. 

Making Nasi Ulam is not rocket science, far from it, but there are several steps or parts to consider before the final piece of puzzle fell into place. 

With the lengthy list of fresh herbs and spices that go into making Nasi Ulam, it will not make you feel guilty even if you overindulged. 

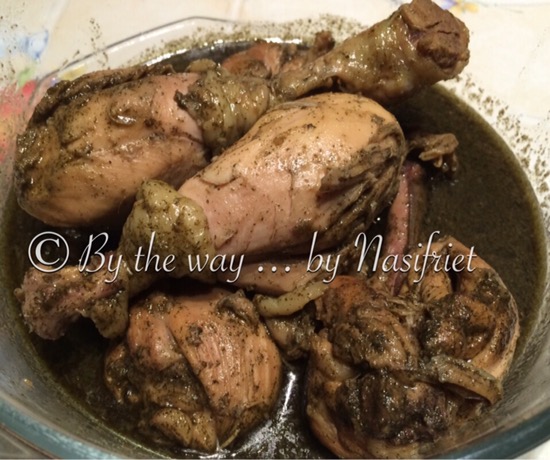
I could eat the fresh and fragrant herbed rice on its own, but a baked chicken on the side certainly made my Sunday lunch more complete and a million percent more alluring and tantalizing.

Like so …


Choosing The Right Rice

I have done this herbed rice before using Jasmine rice. I found it was not quite the right type of rice to use. Why? The grains of Jasmine rice clinged and are somewhat stickier than for example the American long-grain rice or Basmati rice.

So I chose Basmati rice, which is easily available in our local stores. It was also easier to handle and toss the rice with the many fresh herbs and spices that went into the rice.

How to cook the rice in the Thermomix?

Weigh 300 g of basmati rice in the Simmering Basket. Remove it from the TM bowl and wash the rice to remove excess starch.

Place the SB with the rice back in the TM bowl. Add 1kg water. Cook/ steam the rice for 18 mins/ 100C/ sp 4/ MC


Leave the rice in the TM bowl for 10 minutes before taking it out to cool at room temperature.

Choosing Your Fresh Herbs 

I have been looking high and low for torch ginger (bunga kantan) but it’s nowhere to be found in our local Asian stores where I live. It’s a shame because bunga kantan is one of the main star herbs in Nasi Ulam. Well, it’s not the end of the world. There are many other fragrant herbs I could find to complement the making of my version of homemade Nasi Ulam

By the way, I used 7 different fresh herbs, of which 4 herbs were bought at the Asian store whilst the remaining 3 herbs can be found easily at the hyper market.


Spiced and Flavoured Ingredients


  • 1/2 cup dried shrimps (hay bee), soaked
  • 1 cup dessicated coconut
  • Salted fish 
  • Shallots
  • Galangal
  • Lemongrass
  • Turmeric 
  • Freshly-milled white Sarawak pepper
  • Coarse sea salt, to taste

Herbed Ingredients 


  • Eryngium foetidum (Culantro)
  • Thai sweet basil leaves
  • Mint
  • Coriander (incl roots)
  • Flat leaf parsley
  • Kaffir lime leaves
  • Dill

Making Kerisik

Toast the dessicated coconut until golden brown. Transfer to TM bowl and grind for 10 sec/ sp 10. Scrape the sides of the inner bowl. Check the consistency. Grind for another 10 sec/ sp 10. Tip the Kerisik into a clean bowl and set aside.


Toasting the hay bee

Drain the water from the dried shrimps. Transfer the hay bee to the TM bowl. Blend for 5 sec/ sp 5.5.  Tip the roughly blended dried shrimps to a hot pan. Toast the dried shrimps until lightly brown and crusty. Transfer the toasted shrimps to a clean bowl. Set aside.


Dry-frying the salted fish 

I have bought an already fried salted fish from a local Asian store. All I did was to scrape the meat from the bones and head of the fish. I then dry-fry the fish and shred the meat. Set aside.


Chiffonaded Herbs

This was by far THE most time consuming part of ‘the making of’. 

Every single herb was chiffonaded evenly ( or almost 😉 ). I did not use my thermie for that because the herbs should end up in thin long strips and not chopped crazy or bruised too much. Patience is key here 😉


Assembling the Dish: Le Moment Suprême 

After all the chopping, slicing, toasting, shredding, blending, grinding etc, came the plain sailing and uncomplicated part: the assembling 🙂

From white boring rice, I transformed it to a golden colour with fresh turmeric. In went the spices one after another, completely coating the basmati rice. Then came the natural umami flavours in the form of dried shrimps, salted fish and kerisik. The greens were folded in last while going through the taste test before plating up.


By right the rice should be cooled down before the spicing and herbing, but there’s always a someone in the family who would freak out eating cold staples, so I microwaved his plate before serving 😬

Be warned! It’s a dry rice salad dish as there’s not a single drop of gravy or sauce in the fragrant herbed rice. With a stroke of genius, I made a palatable Tom Yum Goong to go with the rice. So no one’s choked at the dining table. Lol!


This is a great dish to bring at potluck. It’s hard work but with some help from my thermie, everything else was straightforward and plain sailing 😉


Have a blessed and smooth sailing week!
Cheers!

#Thermomix · Cooking with Herbs · Informative · Kuching · Main Course · Own Recipe · Poultry · Sarawakian · Savoury · Thermomix · TM5 · TM5 Thermomix

Ka Chang Ma (Braised Motherwort Chicken dish) #thermomix

There is a saying, “You can take a Sarawakian out of Sarawak, but you can’t take Sarawak out of a Sarawakian“. It’s a quaint way of saying that you are bound to remember your roots wherever you are 🙂

This is so true in my case, where food is concerned, of course. I’m sure many people fall in the same boat as I do *wink*  

Moving to Belgium some two decades ago, revisiting and reminiscing childhood memories in any shapes and forms become a norm. The dish that I often re-visit time and time again is none other than the murky-looking green dish called Ka Chang Ma (KCM) where chicken meat is the main protein ingredient in the recipe. This dish is undisputably renowed (only) in Sarawak, especially in Kuching. It’s not everyone’s favourite dish, to be honest, because the dish has been stigmatised as a food for women in confinement. This conservative rationale no longer holds true today. KCM is cooked all year round.

Thermomix Cooking Defined

3 years ago, I posted a rather comprehensive write-up of this unique dish, with a story to tell. You can read it all here: Ka Chang Ma (The Mother of all Dishes)

While it was prepared the conventional way (with Mum’s recipe et al) then, I converted the recipe in the Thermomix jargon. Now, I have both methods on my blog which I can refer to anytime  🙂


KCM cooked the Conventional way (day light)
 
KCM cooked in TM5 (night light)
  

Cooking in either way had no influence on the taste (the end result), however, the cooking processes were obviously different. 

In a nutshell (metaphorically speaking): You want to go to Restaurant X. You have a choice of either taking the car which takes 5 mins OR on foot, which takes 15 mins. By either taking the car or going on foot, you will reach the same ultimate destination. The differences are the mode of transportation and the duration it takes from origin to destination. In this example the car was the Thermomix  way of cooking, whilst going on foot was the conventional  or traditional way of cooking. Got it?

Or simply, the Thermomix is just another collection of kitchen gadget in addition to a Slow Cooker, a Multi Cooker, a Pressure Cooker, etc that you might already have, only that it replaces at least 10 kitchen appliances: blender, grater, chopper, steamer, (slow)cooker, rice cooker, mixer, soup maker, dough kneading machine to name but a few.

Any conventional recipe can be converted to the TM method. There’s no secret. There’s no trick.  All you need to do is to decipher the logic.


How I cooked the KCM in my TM5

Ingredient A –

  • 10 g loose leaf KCM (Motherwort) dried herb 

Ingredients B –

  • 20 g sesame oil
  • 695 g chicken drumsticks 

Ingredients C –

  • 10 g ground KCM dried herb
  • 10 g ground ginger
  • 50 g whiskey 
  • 200 g water

Ingredients D –

  • 20 g whiskey 
  • 300 g water
  • 1/2 cube vegetable stock
  • 1 tsp ground ginger 
  • 5 g sesame oil

   
 How to prepare?

  1. Toast the loose leaf KCM in the TM bowl for 10 mins/ V/ sp1
  2. Grind the toasted herb when the temperature drops below 60 deg C. Mill for 1 min/ sp6 -> 10
  3. Tip ground KCM in a clean bowl. Set aside.
  4. Add B in TM bowl. Cook for 5 mins/ V/ R/ spoon.
  5. Add C and cook further for 22 mins/ V/ R/ spoon
  6. Adjust seasoning by adding D. Cook for a further 5 mins/ V/ R/ spoon
  7. Done!


Verdict : KCM is undeniably one of my favourite comfort foods. With its myriad of nutritional benefits, I could have this dish anytime I want, but like many things, there is always a limit. Moderation is key.  By the way, I have cooked several different dishes with or without using the Thermomix. There are some dishes that worked better the conventional way. For KCM, if given the choice, I would cook the dish in my TM5. Why? Because the cooking is 100% done in the Thermomix, from dry-roasting the herbs to grinding the herbs to braising the chicken. Et voilà, dinner’s served! Simply effortless.

The KCM Chicken dish (or braised Motherwort Chicken dish) is a local dish of Sarawak. For this I’m linking this post to April Tea Time Treats: Local & Regional Recipes hosted by Lavender and Lovage and The Hedgecombers

  
Ka Chang Ma is Motherwort, an herbaceous plant of the mint family. This recipe uses only the dried herb. I’m linking this post to Lavender and Lovage’s Cooking with Herbs for Easter and Spring


Have a great week!

Cheers!

Cooking with Herbs · Easter · Eggs · Simply Eggcellent · South East Asian · Sweet · TM5 Thermomix

Freshly-pressed Pandan Kaya (Fragrant Pandan Coconut Egg Jam) #thermomix

One beautiful Saturday afternoon, I hosted a potluck lunch for my girlfriends (without partners and kids), whom you have ‘met’ on these posts, here and here. One of the girls, C, just visited a farm near her place before coming to my house. She’s a great multi-tasker, conjuring 2 absolutely mouth-watering plates of stir-fried veggies a la minute in my kitchen! And not only that, she brought her fresh homemade pizza dough and baked 3 different toppings of pizzas that afternoon! Yup, in my kitchen. Thanks, C. All 3 dishes were absolutely DIVINE and went down our tummies effortlessly!  


Oh yes, the farm visit. C bought 3 dozens of super, super, SUPER fresh eggs. She must have waited for the chicken to lay the eggs at the farm as she was the last one to arrive that afternoon. Lol! Oh by the way, she also brought a Chiffon Cake pan, in the hope of using some of the eggs to bake a nice pandan Chiffon Cake in my kitchen, using my recipe, here.  

But alas, there was no baking of a Chiffon Cake because everyone was stuffed to the brim and was too tired to do anything “strenuous” that Saturday afternoon. 

Girls, thanks for bringing your “lucky” pot(s).  It was gluttony all the way. Tsk! Tsk! Tsk!  😱


Before the girls left, C gave me 10 of the freshly laid free-range eggs. Boy, I felt so bad that I did not show her how to bake the Chiffon Cake. Sorry, C 😦

Making Good Use of C‘s Fresh Eggs

I knew exactly what I wanted to do with the super fresh eggs I got from C. Making my childhood favourite toasted bread spread, called kaya, had always been on my to-do list since time immemorial. Kaya is a Malay word, meaning ‘rich’, because of the creamy and custardy texture from the coconut cream/ milk and eggs (chicken or duck) and sweetened with sugar. Then other flavours or colours come in. If the kaya is brown, palm sugar or gula Melaka or gula Apong is used, whilst the green-coloured kaya is flavoured with the sweet and fragrant herb called Pandanus (or Screwpine). 

  
I was lucky I had a packet of frozen pandan leaves in my freezer ~ not opened or used yet ~ but telepathically, waiting for me to conquer ’em. So yes, I was making the fragrant pandan coconut jam – FINALLY!

Great Helper

The most basic kaya recipe has only 3 ingredients ~ eggs, coconut cream/ milk and sugar, and yet most people shun from making it. Why? Because the task of standing hours on end stirring the mixture over the stovetop is immensely unexciting, dull and monotonous! It can take as long as 3 hours! It’s not like preparing slow-cooked meat stew that you can leave the cooking unattended, but you need to keep an eye on the kaya mixture, stirring constantly in order to end up with the texture you want, otherwise you have to start all over again! 

In my opinion, there is no one right homemade kaya consistency or texture. This is really subjective and very personal to one’s target preference.

By the way, I recently owned the latest model of the Thermomix, the TM5.  This kitchen gadget has been a great “helper”in my kitchen. Instead of me stirring the mixture, my thermie was doing the job. I could do 101 other things while waiting for my kaya to set. I was even watching the telly!

I know there are many shortcut recipes out there, that could churn the kaya in 10 to 15 minutes. But hey, I’m not the one who’s stirring, so time and energy are not the essence 😜

My objective was to make a decent kaya that I could enjoy and reminiscing my childhood days. Period.

As I have said earlier, the ingredients are pretty obvious in making kaya. Eggs (usually the yolks), sugar and coconut cream/ milk.  Since the eggs I got from C were super fresh, I decided to use 5 whole eggs!

Note: If you do not own a Thermomix, the ingredients remain the same, BUT you need to manually stir the mixture in a double boiler pot or a crock pot or a heavy bottom wok or pan. Eyeballing on the texture and consistency is key. Slow Cooker works well, too. You may want to refer to my pumpkin jam recipe, Slow-cooked Zesty Pumpkin Jam.

Ingredients

  •  5 fresh free-range whole eggs 
  • 140 g castor sugar (increase the quantity if you have sweet tooth, but 140 g is more than sweet)
  • 245 g coconut milk (if possible, get freshly squeezed coconut cream/milk, but there ain’t any here, so the best I could get hold of was 250 ml brik Chaokoh coconut milk)
  • A tiny pinch of sea salt (my secret ingredient)
  • 40 g freshly extracted first-pressed pandan juice (from 20 pandan leaves) ~ a post on how I extracted the pandan juice coming up next on my blog (here).

Preparation ( TM5 way) –

  1. Insert the butterfly attachment in the TM bowl and add sugar and eggs. Mix for 30 sec/ speed 3
  2. Add coconut milk, concentrated first-pressed pandan extract and a pinch of salt. Cook for 40 min/ 98C/speed 2 without MC
  3. Check the consistency of the texture by smearing a small portion of the cooked kaya with the spatula against the inner bowl of the TM. If the kaya mixture is still too runny, it’s not done yet, however, if the mixture takes a while to roll back to the bottom of the bowl, then it’s done. (Note: I had to do the ‘test’ twice as the consistency of my kaya was still a bit runny in the first 40 mins. I  added 2.5 mins * 2 at 90deg C.  Be warned that the texture and consistency of the kaya is subjective. If you prefer a runny kaya, then by all means, cook for a shorter time. I prefer a less runny kaya,  that’s all 😜)
  4. Once you have reached the texture you want, blend the mixture for 20 seconds from speed 0 to 4 for a smoother consistency (Note: you can blend above speed 4 if you don’t mind the mixture splattering to the lid and the sides of the inner bowl)
  5. Pour the kaya into sterilized jar(s). Refrigerate once cooled.
  6. Done!


My all-natural fragrant pandan coconut egg jam. 

How to eat Kaya ?

Imagine kaya as your Nutella spread, or peanut butter or jam or confituur. For me, I like to spread my kaya on white toasted bread with a layer of butter. The best brekkie or High-tea. Mmm… 


Oh by the way, with this recipe, I could only fill one jar, which is luckily bigger than the normal jam jars. It’s really quite addictive and Preciousss!! So you can imagine how miserly the consumption was. Lol!

This makes a great tea time treat anytime. For this, I am entering this post to the monthly Tea Time Treats Linky Party – March 2016 hosted by Karen of  Lavender and Lovage and  Jane of The Hedgecombers 

  
With such fresh eggs used in this recipe, I would not miss the boat this month on Dom’s Simply Eggcellent #13 – A Celebration of Eggs! over at Belleau Kitchen.

  
With the all-natural green colour from one of South East Asia’s most beloved herbs, the pandanus, I’m thrilled to link this post to Lavender and Lovage’s Cooking with Herbs for Easter and Spring


A Blessed AND Peaceful Easter!

Shalom!

Cooking with Herbs · Salad · Vegetarian

Carpaccio of Tomato with Pesto Calabrese, Pickled Fennel and Fresh Basil

I was at a dentist recently ~ last year in December ~ to be precise. While waiting for my turn at the waiting room I was browsing one of several magazines on the mag rack called BodyTalk.  The mag talked about health issues and the human anatomy, etc.  I was intrigued. And I was equally intrigued with the second last page. A recipe corner with healthy ingredients! 

The one that tempted me most was this one!

  
I hope to replicate this tasty looking vegetarian carpaccio at home. 

The only manner to remember the ingredients of the recipe was to take a snapshot of the page 😉

And that I did!

I made this carpaccio as starter for Sunday lunch and my three guys’ eyes twinkled with delight. 

Mmmm… Yummy!

Here’s my version


NOTE
: The recipe was in Dutch. I tried my best to translate the words to the best of my knowledge. And by the way, in the original recipe, spelt grain, rockett leaves and Legumaise Toscane were used. I replaced those ingredients with pine nuts, fresh basil leaves and Pesto Calabrese respectively. 

Ingredients

  • 2 plump tomatoes (more than enough for my family of 4 as a starter. Original recipe called for 8!)
  • Fennel 
  • 24 to 30 fresh basil leaves
  • 1 red onion 
  • 2 cups pine nuts (lightly dry roast in a pan)
  • Parmesan cheese, shaved
  • 4 heap tsp Pesto Calabrese
  • 8 Tbsp olive oil
  • Juice of 1 lemon
  • 1 tsp each coarse sea salt and black peppercorns (ground with pestle & mortar)


Method

  • Wash /clean the fennel and using a mandoline, slice it thinly. Place the fennel in a clean bowl. Add 8Tbsp olive oil and juice of 1 lemon. Spice it up with 3/4 tsp freshly ground black pepper and coarse sea salt. Mix and let the fennel marinate in the fridge.
  • Wash the tomatoes and slice them thinly as well as the red onion
  • Ready to serve. Plate each serving plate with the pesto first and then assemble the carpaccio of tomatoes next. Then sprinkle some thinly sliced red onion. Distribute the marinated (pickled) fennel evenly over the spread. Grate some Parmesan cheese and add some fresh basil leaves, 6 to 7 leaves per plate. Sprinkle some  pine nuts and finally drizzle extra virgin olive oil.


Smakkelijk
  

The colours were just stunning. Incidentally they’re the colours of the Italian flag! The taste of Meditteranean also came alive, and despite the cold winter temperature outside, the cool and refreshing platter neutralises the acidity and heat of our body.


Verdict: My first vegetarian carpaccio and definitely not my last. This is a great dish for any season. Trust me! I would consider making this as a main dish during Summer, albeit a bigger plate. I will also make my own pesto Calabrese, and substituting the fresh basil with rockett leaves. 

Hasta la vista... I’ll be back!

I’m thrilled to link my first post of the New Year to Lavender and Lovage’s Cooking with Herbs January 2016: Herbs and Citrus Fruits


Happy Weekend all!

Cheers!

A2K Vegetable Palette · Cooking with Herbs · Nostalgia · Own Recipe

Chestnut Pumpkin Soup ~ A Nostalgic Tale

When I was a kid, Mum did not cook pumpkins a lot, especially the yellow/orange/red types. The ‘pumpkins’ I was more familiar with were the Asian Squashes, such as bitter melon, chinese okra or angled loofah (ketola), hairy melon or moqua, and chinese winter melon.

Down Memory Lane

One day, one of my Aunts (Mum’s eldest sis) who was staying with us briefly, cooked a pot of pumpkin dish in my Mum’s kitchen. The pumpkin was cut in square-ish chunks, cooked with dried anchovies and shallots and seasoned with white pepper and salt. I remembered being served a plate of rice with the pumpkin dish and one whole fried fish. There were 5 identical plates served on the long rectangular table for us 5 siblings then. Mum was in confinement with her 6th and last, hence my Aunt was given the role of Nanny.

The 5 of us were seated orderly at the table. As soon as we finished our meal, we were free to leave the table. After a few minutes, the first one left, then the second and the third and fourth. The 5th remained….20, 30, 45 minutes… On her plate was a small amount of rice with the chunks of pumpkin left untouched or pretty much, untouched, while the fried fish was a bony structure, ie all gone. Tick Tock, Tick, Tock…. the 5th was still at the table. Her dinner plate was as cold as ever. Two beady eyes were watching from right oppposite the table. There was no escape. The 5th just could not get the pumpkin dish down her throat. She felt like puking from each single bite. It was sheer agony. Unfortunately, “Nanny Beady Eyes” did not allow the 5th to go scot-free. The end result? The 5th was ‘forcefully’ spoonfed until she gave in with tears rolling down her cheeks ….

Aarrggh!!!

By the way, “Nanny Beady Eyes” was not a bad Aunt at all. She had cooked fabulous dishes for us kids. That one dish just did not appeal to one child and that child happened to be moi !!!!! Oh… how I detested pumpkins from then on!

>>> Fastforward >>>  I was in Belgium at my MIL’s house. It was a cold and wet Autumn day. We gathered at the dinner table and there was this bowl of brilliant orange soup. It was so tasty and creamy and bang on the money. I was drooling for my second bowl. YUM!

And guess what I had eaten at my MIL’s? 

Yup, pumpkin, of course, but served differently. I have gone 180 degrees because I have begun to LOVE pumpkins! I have cooked countless pumpkin soups since then, pumpkin curries, pumpkin gratin and even pumpkin jam and roasted pumpkin seeds (Recipes Here and Here)!

And the star of today’s post is Ms Chestnut Pumpkin. Love her lots *wink*

And by the way, this pumpkin did not cost me more than a Euro! It was darn cheap at only 89 Euro cents!!


I have made this soup innumerable times and it has always been a hit with my guys. 

With the cold and wet Autumn weather at hand, a bowl of hot and tasty soup is always welcome 😉

Here’s my favourite. Simple, healthy and hassle-free recipe with ingredients you can get easily. 

Ingredients

  • 1 small chestnut pumpkin, skinned
  • 4 stalks celery
  • 1 onion, peeled 
  • 3 cloves garlic, peeled
  • 1 potato, washed and peeled
  • 2 Tbsp vegetable stock paste (homemade)
  • Coarse sea salt and black peppercorns, ground, to taste
  • Meatballs (optional)
  • A pinch of curry powder, to taste
  • Water
  • Light cream, to drizzle 
  • Fresh parsley, chopped (for garnishing)

   
 Method –

  • Cut the skinned chestnut pumpkin in 2 halves. Remove the seeds. Roughly chop.
  • Remove the stringy layer of the celery stalks, wash and roughly chop
  • Roughly chop the onion and potato 
  • Throw all chopped ingredients in a soup pot. Add in the 3 cloves of garlic 
  • Add 1.8l water. Boil until the vegetables have softened. Remove the pot from the stove.
  • With a hand mixer, blend the veg to a smooth consistency. Add in the veg stock, ground salt and pepper and blend to combine
  • Place the soup pot back on the stove to heat the soup
  • If you want meatballs in your soup, this is the time to throw them in ( either store-bought or freshly made). For vegetarian version, omit the meatballs
  • Heat the soup until the meatballs float to the surface 
  • Serve hot with drizzles of light cream and chopped parsley. I have tried my best to make a design of a cobweb. Not quite there yet…

   
Amazingly, with a different angle, room and light, my chestnut pumpkin soup blushed 😊

 
Trick or Treat?

With Halloween round the corner, this soup makes a healthy and wholesome treat. Not a drop of oil or butter was used in this recipe. 

My nostalgic Pumpkin Soup. YUM!


Without much ado, I’m linking this post to the following blog-hop cooking challenges –

October Tea Time Treats: Halloween & Bonfire Night Treats hosted by Karen from Lavender and Lovage and Jane from The Hedgecombers
  
Cooking with Herbs for Autumn hosted by Karen of Lavender and Lovage 

 
A2K’s Vegetable Palette for the month of October: The colour ORANGE, hosted by Shaheen


ALL HALLOWS’ EVE 
in advance!

  
Cheers!